This document provides a step-by-step process for creating and managing to-do lists. Follow these instructions to efficiently organize tasks, customize your lists, and keep track of completed items.
Step 1
To create a new task, click on the plus icon. You can also select it from the border and choose "Add New To-Do List."
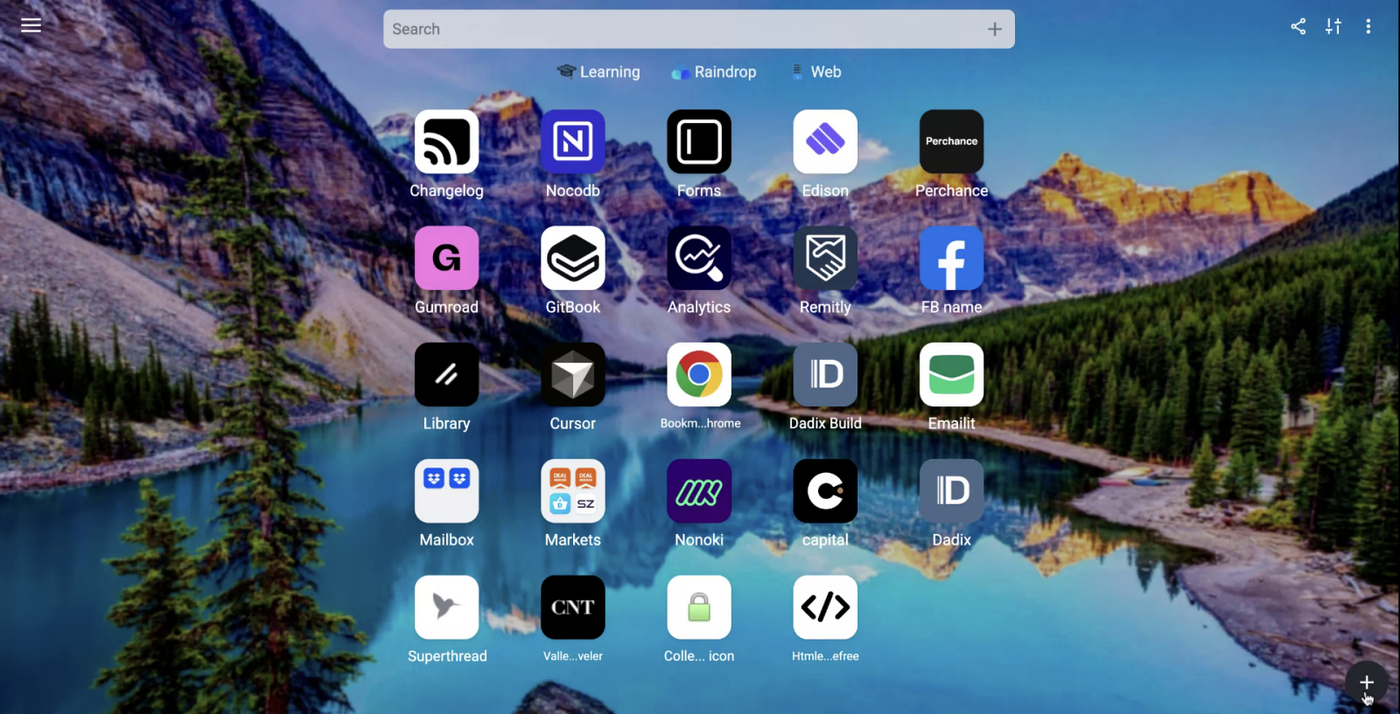
Step 2
Proceed to create a new list.

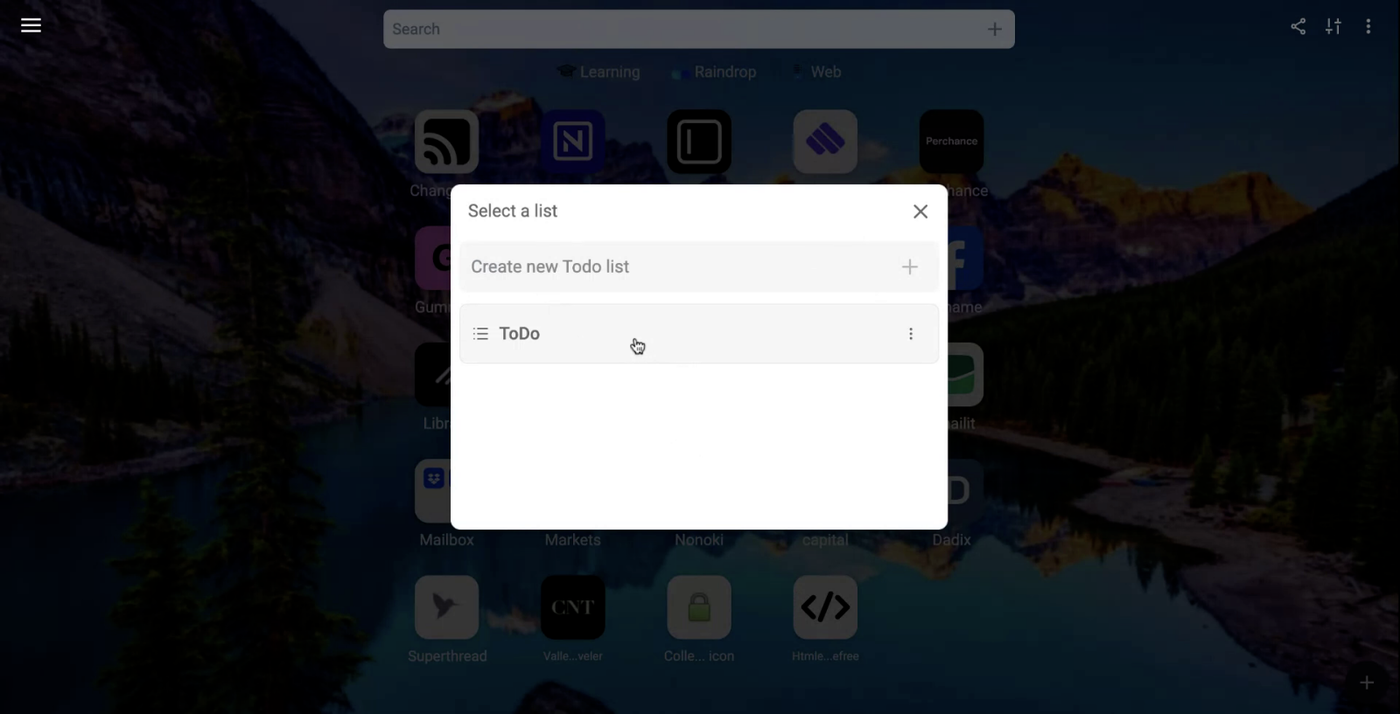
Step 3
Assign a name to your list, such as "To-Do."

Step 4
Once the list is created, you can set it up by placing it in your desired location.
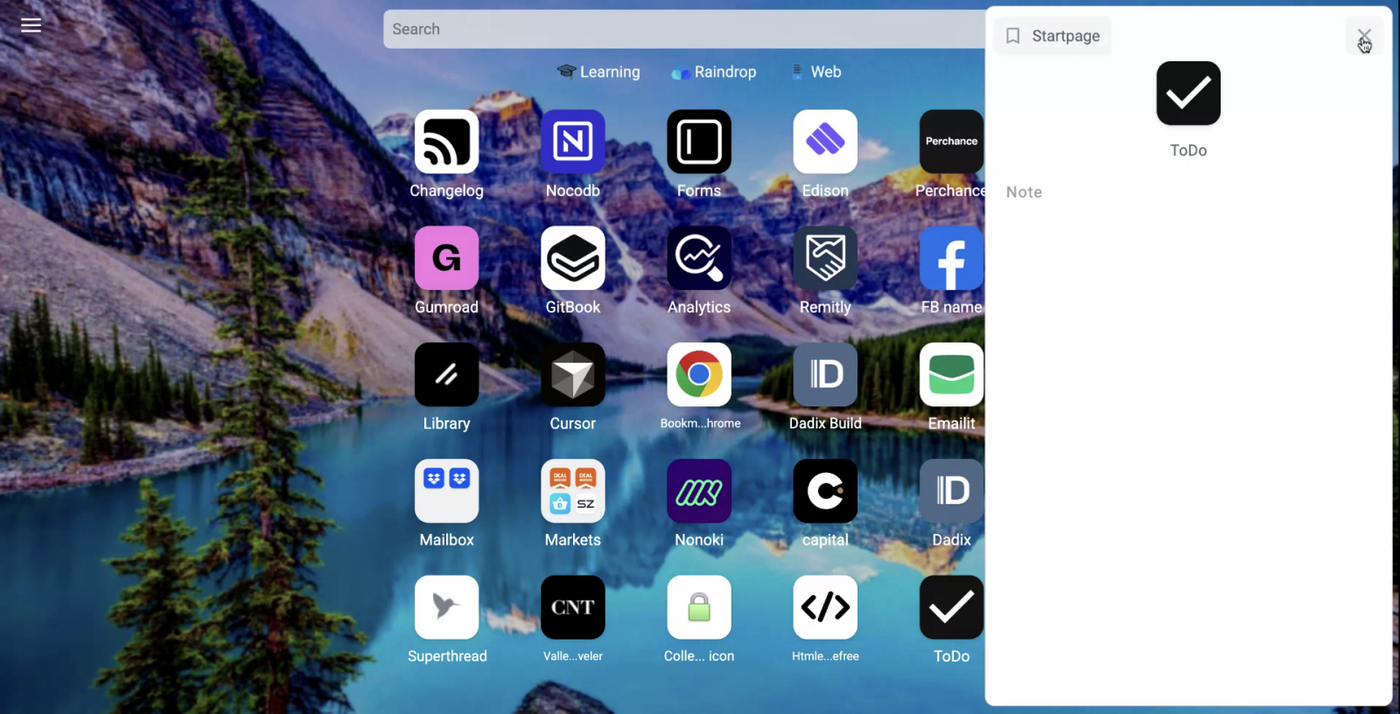
Step 5
The list functions like a simple bookmark. You can modify the location and add notes related to the title.

Step 6
Locate your list using the search function.
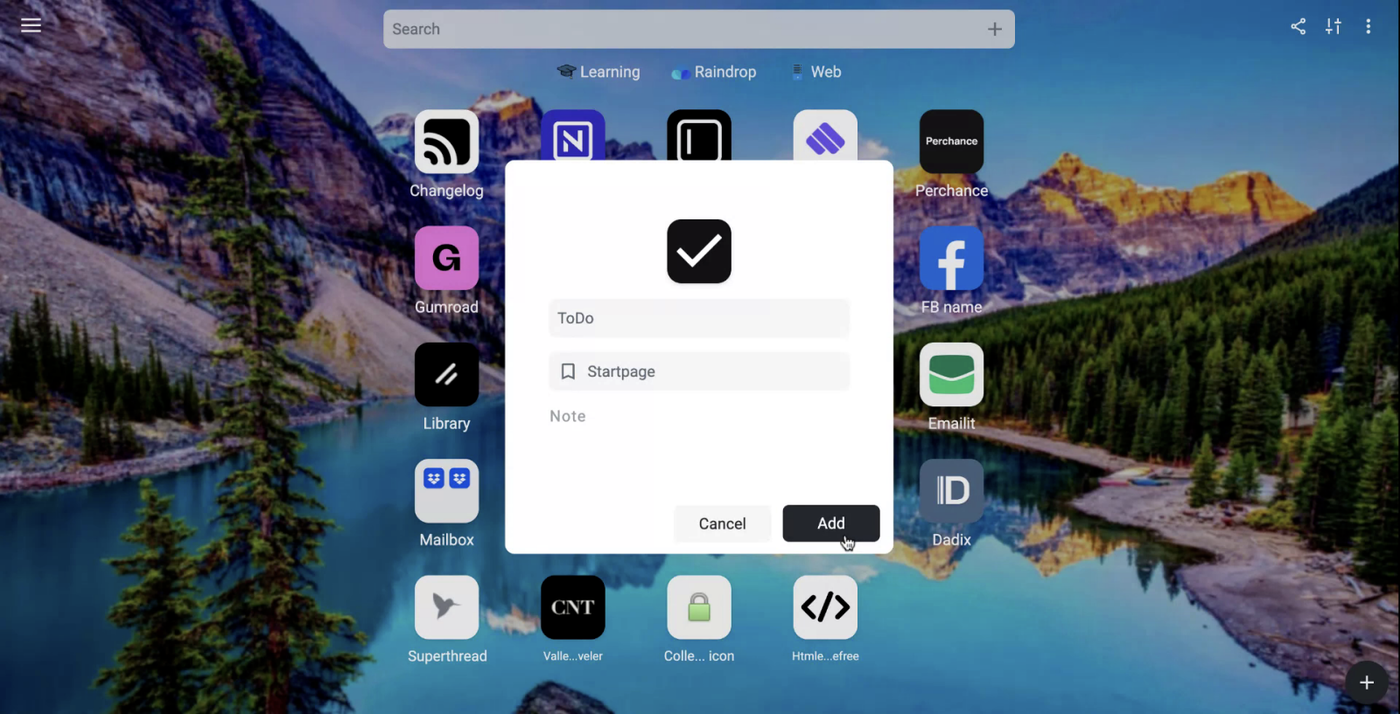
Step 7
If desired, you can change the icon or the title of your list.
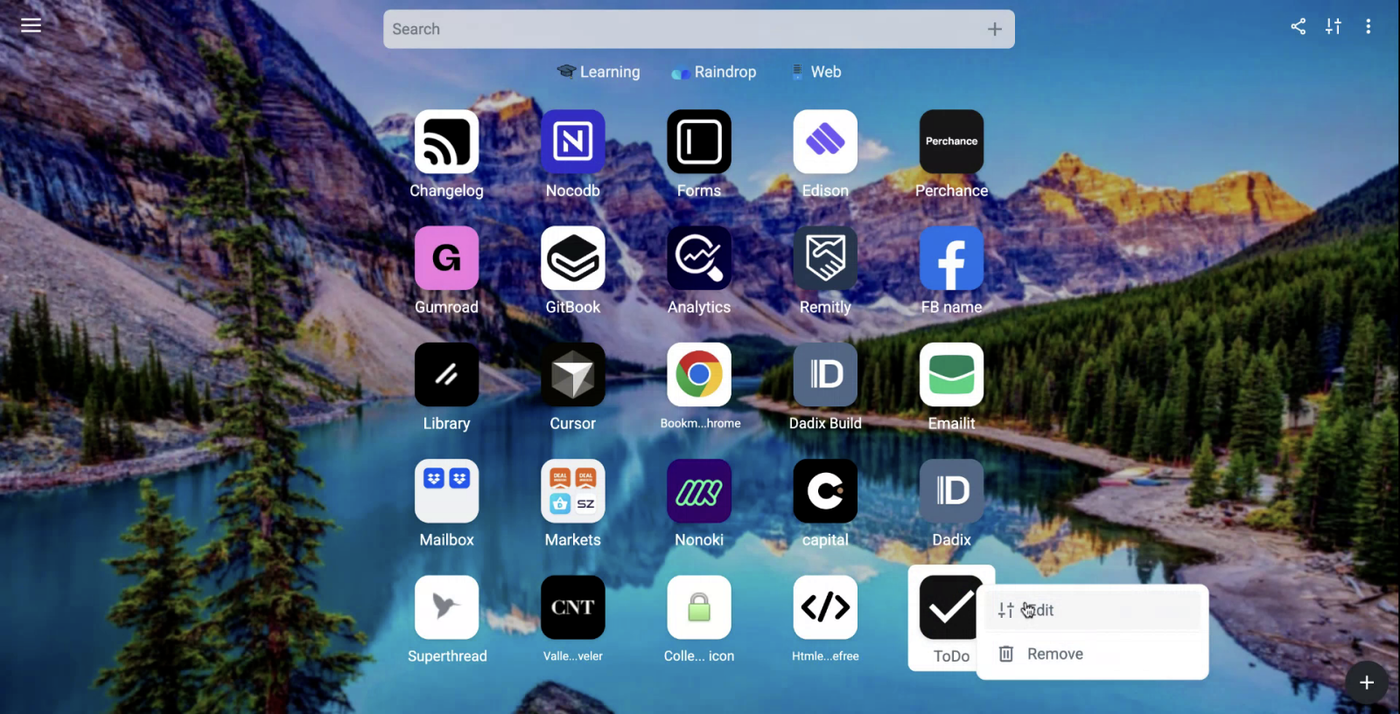
Step 8
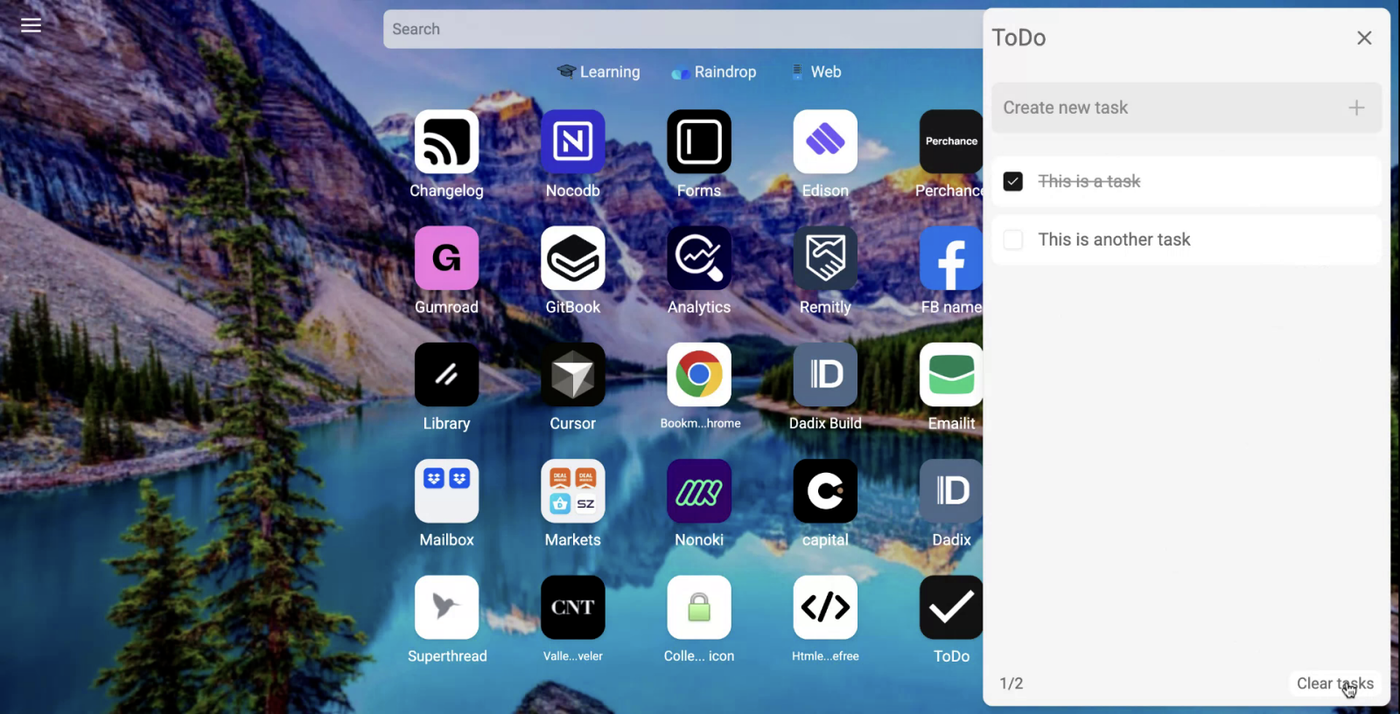
The list operates like a simple bookmark. Open it to view your to-do list.
Step 9
Begin adding tasks to your list.
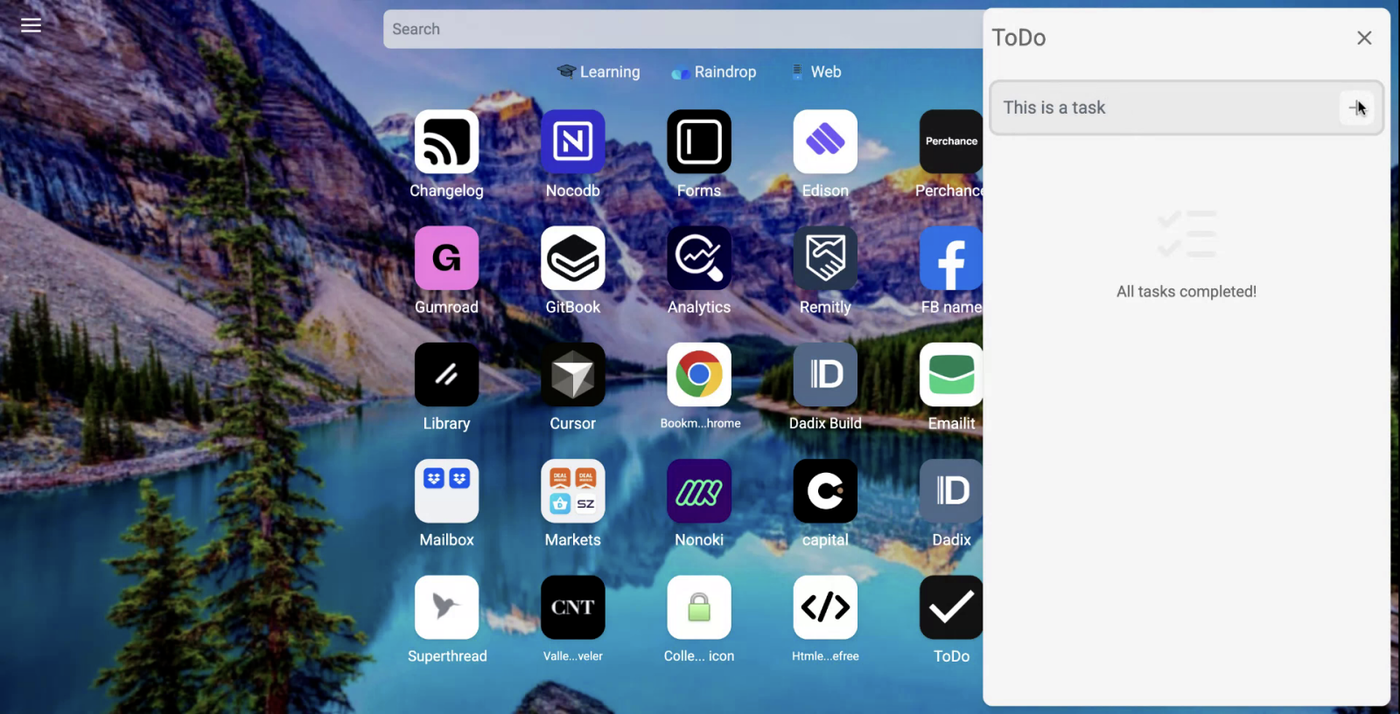
Step 10
Add additional tasks as needed.

Step 11
Mark tasks as completed when they are done.

Step 12
You have the option to modify, rename, or remove tasks.

Step 13
If you select "Clear Tasks," the tasks will be hidden.